- Home
- Collecting & Sculpting
- How Do You Make Porcelain
How Do You Make Porcelain?: A Master Ceramicist's Complete Guide to Creating Fine China
Most people recognise porcelain by its translucency, luminosity, pristine clean whiteness, and the bell-like ring distinctive when tapped. Few understand the alchemy required to discover it's secrets, and the frantic European race over 300 years ago to discover how to transform common rocks and minerals into one of the most treasured materials known to man.
I, myself, was drawn to the allure of the 'white gold and it became my life and my obsession. After four decades as a ceramic sculptor specializing in fine bone china porcelain, I have collaborated with the finest English artisans in this noble field, their skills having been passed down, person to person, for over 250 years unbroken, here in the UK. That is really something.

My expertise is in the sculpting of the masters for production - around which everything else in the process revolves. I was privileged to see, first hand, the skills of my colleagues whose understanding of porcelain's unique characteristics and requirements was second to none. These colleagues have helped me fact check the instructions on this page.
This comprehensive guide truly answers the question 'How do you make porcelain?' by revealing the complete porcelain-making process I have curated from working with some of the greatest porcelain factories the world has ever seen, Royal Worcester, Royal Doulton, Wedgwood, Coalport/Minerva. These are the big guns, historical jewels. This guide goes from from raw material selection through to final firing, including professional techniques rarely shared outside master ceramicist circles.
Table of Contents
What is Porcelain?
Porcelain is a high-fired ceramic material that achieves vitrification. This is a glass-like, non-porous state, at temperatures between 1300°C and 1450°C (2372°F to 2642°F). Unlike earthenware or stoneware, properly fired porcelain exhibits three defining characteristics:
- Translucency - Light can be observed passing through thin sections
- Complete vitrification - The material is never porous when fired to maturity, unlike earthenware
- Exceptional strength - Porcelain has a higher tensile strength than steel at the same thickness
Historical Context
 Johann Friedrich Böttger finally cracks the formula for 'white gold' for Augustus the Strong.
True porcelain originated in China during the Tang Dynasty (618-907 CE), remaining a closely guarded secret for nearly a thousand years. European attempts to recreate "white gold" failed time and time again, only producing a softer, weaker version of lesser quality called 'soft paste' and other lesser versions. Then, in 1708, German alchemist Johann Friedrich Böttger finally cracked the formula whilst taken captive, imprisoned and forced to make various alchemic concoctions (including the attempt at making gold) for Augustus the Strong of Saxony.
The secret of the process lay not just in ingredients, but in the understanding of the precise mineral transformations occurring at extreme temperatures.
This is the knowledge I will share throughout this guide.
Essential Materials and Tools
'How Do You Make Porcelain' Guide - EssentialsCore Ingredients
Primary Clay Body Components:

- Kaolin (China Clay): 25-50% - Provides plasticity, whiteness, and high fusion temperature (refractoriness)
- Feldspar: 25-35% - Alkaline earth that acts as a flux; lowering firing temperature and promotinng vitrification
- Silica (Quartz): 15-25% - Adds structural strength, reduces shrinkage, preventing warping
So, think of kaolin as the backbone of porcelain, contributing to its purity and translucence. Feldspar is the flux - melting during firing and helping bind the other components into a vitrified, glass-like body. Whilst quartz does more than reduce shrinkage, it also imparts mechanical strength and helps maintain shape during firing.
Secondary Additives:
 Grog, bentonite and ball-clay
- Ball Clay: 5-15% - Increases plasticity and green strength. Fine particle size improves workability.
- Bentonite: 1-2% - An ultra-fine clay that enhances plasticity in low-plastic bodies; also aids suspension (keeps the mix from separating.)
- Grog: 5-20% - Pre-fired porcelain added to reduce shrinkage, warping and cracking.
So, ball clay is a secondary clay rich in montmorillonite. It’s highly plastic but can increase shrinkage if overused. Keep to the range stated. Then, bentonite is extremely fine and potent, often used in small amounts (<2%) due to its swelling behaviour and high water absorption. It’s especially useful in casting slips and low-plastic formulations. Then grog is essentially crushed, pre-fired ceramic (often porcelain or stoneware). It adds “tooth” to the body, improves thermal shock resistance, and minimizes drying/firing shrinkage. The 5–20% range is appropriate, depending on mesh size and desired texture.
Essential Equipment
Preparation Tools:
- Pug mill or clay mixer
- Scales accurate to 0.1g
- 80-mesh sieves for consistent particle size
- Plaster bats for drying clay bodies
Shaping Equipment:
- Potter's wheel (for throwing)
- Plaster molds (for slip-casting)
- Clay tools and ribs
- Calipers for measuring wall thickness
Firing Equipment:
- Electric or gas kiln capable of 1450°C
- Kiln furniture (shelves, posts, stilts)
- Pyrometric cones for temperature verification
- Kiln wash to protect shelves
The Complete Porcelain Making Process
'How Do You Make Porcelain' Guide - Complete process
Stage 1: Clay Body Formulation and Preparation
Creating a porcelain body, ie. the specific mix of ingredients that gives porcelain its unique properties, requires precise mineral ratios - a different set for each type of forming technique
Jigger/Jolly Porcelain Body Formulation
This body is engineered for mechanical forming over rotating moulds using profile tools. It prioritizes mould release, dimensional stability, and consistent shrinkage.

Peter Holland Industrial Jigger/Jolly Body:
- Grolleg Kaolin: 40%
- Potash Feldspar: 30%
- Silica (Quartz): 20%
- Ball Clay: 7%
- Grog (Fine Mesh): 3%
Critical Preparation Steps:
- Dry Blending: Weigh ingredients to ±0.1% accuracy. Uniformity is essential for mould conformity and firing success.
- Water Addition: Add 18–20% water by weight for pugged bodies (mechanically mixed and processed in a pugmill); lower than throwing clay to ensure mould release and dimensional stability. Firmer texture supports profile tool shaping and clean mould release.
- De-airing: Pug mill with vacuum chamber recommended. Air pockets compromise compression forming.
- Optional Aging: 1–2 weeks in sealed damp storage improves cohesion and reduces tearing under pressure.
- Water Content: ~18–20% by weight
- De-airing: Essential for compression forming air pockets cause warping or blowouts.
- Aging: Optional but beneficial for plasticity and mould conformity.
- Texture: Firmer than throwing clay; must hold shape under profile tool pressure.
Industrial Priorities:
- Uniform shrinkage
- High green strength
- Clean mold release
- Compatibility with plaster or resin molds
Slip Casting Porcelain Body Formulation
Designed for fast mould fill, clean drain, and smooth surface finish. This body excels in hollowware and fine detail reproduction.

Peter Holland Industrial Slip Casting Body:
- Grolleg Kaolin: 35%
- Potash Feldspar: 25%
- Silica (Quartz): 20%
- Ball Clay (SGP or equivalent): 15%
- Bentonite: 0.5%
Slip Casting Preparation and Additives
Slip casting requires a finely tuned slurry with predictable flow, minimal sedimentation, and excellent mold release. These preparation steps and additives ensure consistent industrial performance.
Slip-Specific Additives:
- Deflocculant: Sodium silicate or Darvan 7 (0.2–0.5%) to reduce water demand and improve flow.
- Water Content: Adjust to achieve a specific gravity of 1.75–1.85 depending on casting thickness.
- Optional Barium Carbonate: ~0.1–0.3% to prevent scumming from soluble salts.
Critical Preparation Steps:
- Slaking: Soak bone-dry materials thoroughly before mixing to ensure full hydration and dispersion.
- Mixing: Use high-shear mixing to create a uniform slurry with stable viscosity.
- Deflocculation: Add deflocculant gradually while monitoring flow and specific gravity.
- Water Addition: Fine-tune water content to match mould type and casting thickness.
- Sieving: Pass slip through 80–100 mesh to remove agglomerates and ensure smooth casting.
- Aging: Store slip for 1–3 days to stabilize viscosity and improve surface finish.
Industrial Priorities:
- Fast mold fill and clean drain
- Minimal sedimentation during casting
- Consistent shrinkage and firing behavior
- Smooth surface finish for glazing or decoration
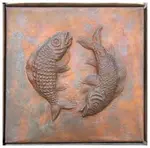
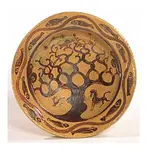
Professional Insight: In UK industrial porcelain manufacturing, selecting the correct clay body is critical to mould compatibility, shrinkage control, and surface finish. Jigger/jolly body is used for symmetrical hollowware like plates, bowls, and sometimes cups. It requires firm, de-aired clay with high green strength and clean mould release. Slip casting body is for figurines, vases, and intricate forms. It prioritises flow, minimal sedimentation, and smooth surface finish. Deflocculants and precise specific gravity control are essential. Press-moulded porcelain is often used for shallow relief work, tiles, or decorative panels. Requires a stiff, low-plastic body that holds detail under compression. Used at factories like Wedgwood, Worcester and Doulton for bas-relief and architectural elements.
Note: Wheel-thrown porcelain was not part of standard factory workflows. Master forms were shaped in modelling clays suited to carving or jiggering, not in final vitrified bodies.
Stage 2: Forming Methods
There are three primary ways to give porcelain its form within the context of a professional production run.
1. Creating a Master Sculpture (Modelling)

For fine art, figurines, and repeatable commercial designs, the first step is to create a master sculpture or model. Crucially, this master is not sculpted from porcelain clay itself. Instead, it is crafted from a specialty industrial stoneware clay designed for high-precision modelling. The sculptor/modeller works with this clay to create the final form, which will then be passed to the specialist block & case maker, who then passes his blocks, moulds and cases onto the slip casters (see 3. below).
2. Jiggering & Jollying (Industrial Flatware)

This automated process is the standard method for producing thousands of identical plates and saucers. A plastic, solid porcelain body is used. A lump of clay is placed on a rotating plaster mould, and a profile tool is lowered to shape the piece to a precise thickness and diameter. It is a highly efficient production method that requires the porcelain to be in a solid, plastic form. Jiggering is the term used for making flatware like plates, while jollying is used for simple hollowware like bowls. By contrast, cups, which are a form of hollowware, are usually made using the slip-casting process (below). The cup body is formed by pouring liquid clay slip into a two-part plaster mould, and the handle is a separate component that is also cast in a mould and then attached to the cup.
3. Slip-Casting Process (Industrial Hollowware)
Slip-casting is the primary production method for hollow items, such as vases, teapots, and figurines. This technique uses a porcelain slip, which is the liquid form of the clay body.
- Slip Preparation: Mix clay body with 35-40% water plus 0.3% sodium silicate deflocculant
- Pouring: Fill plaster moulds and allow 15-45 minutes for desired wall thickness
- Draining: Pour excess slip out when walls reach 3-6mm thickness
- Demoulding: Remove when leather-hard (1-3 hours depending on form)
Stage 2.5: Blocking & Casing For Master Mould Production (Block & Case)
For any production run exceeding 20-30 pieces, the blocking stage becomes essential. This is where the ceramic industry transitions from individual craftsmanship to systematic production, a process that separates amateur pottery from professional ceramics manufacturing.
 In block and casing, a silicone mould is immediately taken of the master mould so that new moulds can be made at will.
The Blocking & Case-Making Role
This is one of the most important stages of commercial 'How Do You Make Porcelain'. Once you have your master piece (whether wheel-thrown, hand-built, or sculpted), a specialist craftsperson called a blocker takes over. The blocker's job is to prepare the master for production casting by creating a series of moulds that can recreate the original form repeatedly. He also makes a silicone case (a mould of the plaster mould) so as to be able to make new plaster mould indefinitely for production runs.
Master Preparation Process:
- Assessment and Sectioning: The blocker examines the master piece to determine optimal mould lines where the plaster mould will split to allow casting and removal of greenware.
- Surface Preparation: The master is sealed and prepared to ensure clean mould release and prevent plaster adhesion that would damage the original.
- Initial Plaster Mould Creation: The first working moulds are made directly from the master using fine plaster of Paris, creating precise negative impressions.
[Visual Cue: Professional blocker's hands working on sectioning a master piece, showing the precise knife work required to determine mould lines]
The Two-Stage Mould System
Here's where the production stages of 'how do you make porcelain' reveals its sophistication:
Stage 1: Working Moulds (Plaster of Paris)
- Made directly from the master piece
- Used for actual slip-casting production
- Lifespan: Approximately 20-25 castings before wear compromises quality
- Material: Fine casting plaster for sharp detail reproduction
Stage 2: Cases: Master Blocks (Silicone Rubber)
- Now made from silicone rubber (in times past plaster-of-paris), which is the premium material for reproduction moulds as it doesn't break, chip, and lasts for many years. This process is known as 'case making', and is part of the blocker's job. This they are known as 'Blockers & Casers'.
- Created from the first perfect working moulds
- Purpose: Template for creating new working moulds as originals wear out
- Lifespan: Hundreds of reproductions over many years
The Production Cycle
Initial Setup:
- Blocker creates 2-3 perfect working moulds from master
- Immediately creates silicone master blocks from these moulds
- Production begins using original plaster working moulds
Ongoing Production:

- After every 20 castings, working moulds show wear (loss of detail, rough surfaces)
- New working moulds are cast from the silicone master blocks
- Master blocks remain pristine, ensuring consistent quality across hundreds of production runs
Professional Blocking Techniques
Critical Measurements:
- Shrinkage Calculation: Master forms must account for 12-16% total shrinkage (clay drying + firing). For example, the fine china brands I worked with usually wanted an 8.5 inch high finished fired figurine piece. This meant I had to know the exact shrinkage of their clay slip, because each factory was different, so that I could do the maths and work out the master's modelling height before shrinkage.
- Draft Angles: Slight tapers built into vertical walls for easy mould release. If this is not considered, then 'undercuts' will stop the cast coming out of the mould. Undercuts in sculpting the master are a primary consideration.
- Wall Thickness Consistency: Achieved through careful slip-casting timing rather than mould design.
Quality Control:
Every new working mould cast from master blocks undergoes dimensional checking against the original master. Professional potteries maintain tolerance standards of ±2mm for most applications.
Expert Insight: I've worked with blockers who can section a complex figurine for slip-casting with surgical precision. Their understanding of clay behaviour, mould release angles, and production efficiency often determines whether a ceramic design succeeds commercially or fails in production. All blockers are not created equal. Some are more sought after than others, and they, like me, tend to be collaborators with the big brands rather than employees. I have always said that best blockers are at least as highly skilled as master sculptors, just with a different skill set.
Economic Importance
The blocking stage represents a significant investment per design - sometimes on the thousands for a complex lady figurine - depending on complexity, but even then, this enables production economics that make fine porcelain commercially viable if the editions are high enough. Professional ceramic block moulds last for many thousands of casting cycles when properly maintained. For example, my figurine 'Tara' Celtic Princess had an edition of 7500 units and sold out within months at a retail price of £225 in 1998, generating £1.7 million turnover - thus justifying the huge cost of development and colour supplement advertising
Without this system, every piece would require individual hand-forming, making porcelain tableware and decorative objects prohibitively expensive. The blocking process is what enabled the democratization of fine porcelain from exclusively aristocratic luxury to middle-class accessibility.
Production Planning Note:
Factor blocking costs and timeline (typically 3-5 weeks) into any production run planning. The initial investment pays dividends through consistent quality and efficient production scaling.
This section explains the crucial production bridge between individual craftsmanship and manufacturing scale, something that differentiates professional ceramic knowledge on how do you make porcelain. The blocking stage is where art meets industry, enabling the beautiful porcelain we see in shops worldwide.
If you need further information about this important technical aspect of 'how do you make porcelain', the University of Staffordshire run courses specifically on this - see University of Staffordshire Ceramic Workshops
Stage 3: Drying - The Critical Phase
Porcelain's high shrinkage rate (12-16% from wet to fired) makes controlled drying essential:
Greenware Stage (40-50% moisture):
 Figurine- Greenware
- Cover pieces with plastic, creating small air gaps
- Rotate pieces daily to ensure even drying
- Duration: 3-7 days depending on thickness and ambient conditions
Leather-Hard Stage (15-20% moisture):
- Ideal for trimming and attachment work
- Clay has firmness but retains some flexibility
- Final shaping and detail work completed here
Bone-Dry Stage (0-2% moisture):
- Pieces become chalk-white and extremely fragile
- Ready for bisque firing
- Any remaining moisture will cause explosive failure in the kiln
Expert Warning: I've seen more student work destroyed during drying than any other stage. Patience here prevents heartbreak later.
Stage 4: Bisque Firing - The First Transformation
Bisque firing converts fragile greenware into durable, porous ceramic ready for glazing.
Temperature Schedule:
- Heating Rate: 50°C/hour to 500°C (slow water smoke period)
- Critical Phase: 450-600°C - remaining moisture converts to steam
- Final Temperature: 950-1000°C
- Total Time: 12-16 hours including cooling
Physical Changes During Bisque:
- 0-100°C: Surface moisture evaporates
- 100-200°C: Mechanical water driven off
- 450-600°C: Chemical water removed from clay structure
- 573°C: Quartz inversion - critical heating/cooling point
- 950°C: Clay particles begin sintering
Post-Bisque Testing: Properly bisqued porcelain should absorb water readily when dipped, indicating successful pore structure for glazing. A great tip from the pros on how do you make porcelain.
 The bisque stage
Stage 5: Glazing - The Glassy Coating
Porcelain glazes differ significantly from stoneware glazes in both composition and application.
Glaze Composition Basics:
- Silica: 45-65% - glass former
- Alumina: 8-15% - provides durability and prevents running
- Fluxes: 20-35% - lower melting temperature to match clay body
Application Methods:
- Dipping (Preferred Method):
- Clean bisque of dust with damp sponge
- Immerse piece smoothly for 3-5 seconds
- Lift vertically, allowing excess to drain
- Clean foot immediately with damp sponge
- Spraying (Production Method):
- Ensures even coating on complex forms
- Requires spray booth for safety
- Build up thin, multiple coats rather than single thick application
Critical Glazing Rules:
- Foot Cleaning: Always remove glaze from kiln contact points
- Thickness: Aim for 1-2mm glaze thickness because too thin causes crawling, too thick causes running
- Dust Prevention: Fire within 24 hours of glazing when possible
Stage 6: Glaze Firing - The Final Transformation
The glaze firing pushes porcelain to its physical limits, creating the vitrified ceramic we recognize.
 The beauty of glazed porcelain
Firing Schedule:
- Initial Heating: 100°C/hour to 1000°C
- Critical Zone: 1000-1300°C - slow heating allows glaze/body interaction
- Final Push: 80°C/hour from 1300°C to final temperature
- Peak Temperature: 1320-1380°C for most porcelain bodies
- Soaking: Hold peak temperature for 15-30 minutes
- Cooling: Natural cooling to 1000°C, then can be accelerated
The Vitrification Process:
At peak temperature, three simultaneous transformations occur:
- Glaze Maturation: Glaze components flux completely, forming smooth glass coating
- Body Vitrification: Feldspar melts, fusing silica particles into glassy matrix
- Interface Bonding: Glaze and body chemically bond, creating integral structure
Temperature Monitoring: My expert colleagues use pyrometric cones exclusively for porcelain firing. Electronic controllers can fail; cones never lie about the actual heat work experienced by your pieces.
Professional Tips and Troubleshooting
'How Do You Make Porcelain' Guide - Troubleshooting
Common Issues and Solutions
Cracking Problems:
- S-Cracks in throwing: Clay too soft or throwing too aggressively
- Rim cracks: Uneven wall thickness or too-rapid drying
- Firing cracks: Temperature rise too rapid or clay body/glaze expansion mismatch
Glazing Defects:
- Crawling: Dust or oils on bisque surface before glazing
- Pinholing: Glaze too thick or firing too rapid in critical zone
- Color variation: Uneven glaze application or kiln atmosphere fluctuations
Warping Issues:
- Foot warping: Uneven foot thickness or improper kiln support
- Body warping: Uneven wall thickness or too-rapid temperature changes
Advanced Techniques
Translucency Maximization:
- Use finest particle-size feldspar available
- Minimize iron content in all raw materials
- Fire to full maturity; under-firing reduces translucency dramatically
Strength Optimization:
- Add 10-15% grog to reduce thermal shock susceptibility
- Maintain silica content above 20% for structural integrity
- Consider slow cooling schedule to develop favourable crystal structure
Safety Considerations
'How Do You Make Porcelain' Guide - SafetyHealth Hazards:
- Silica Dust: Always wear N95 respirator when handling dry materials
- High Temperature: Kiln operation requires proper ventilation and protective equipment
- Chemical Exposure: Many glazes contain toxic metals so use appropriate protective measures
Workshop Safety:
- Install adequate ventilation system
- Maintain first aid supplies specific to ceramic injuries
- Never fire kilns unattended during critical temperature phases

Frequently Asked Questions
Q: How long does it take to make porcelain from start to finish?
A: Minimum 3-4 weeks for a simple piece: 1 week clay preparation and aging, 3-5 days forming and initial drying, 1 week final drying, 1 day bisque firing, 1 day glazing, 1 day glaze firing, plus cooling time.
Q: Why is porcelain so much more difficult than other clays?
A: Porcelain has low plasticity, high shrinkage, and narrow firing range. Its "short" working characteristics mean it tears rather than stretches, requiring completely different handling techniques.
Q: Can I make porcelain without a kiln capable of high temperatures?
A: No. True porcelain requires vitrification temperatures above 1300°C. Lower-temperature "porcelain-like" bodies exist but lack porcelain's defining characteristics.
Q: What's the difference between hard-paste and soft-paste porcelain?
A: Hard-paste porcelain (true porcelain) fires above 1300°C and achieves complete vitrification. Soft-paste porcelain contains glass cullet or bone ash, fires at lower temperatures, but lacks true porcelain's strength and translucency.
Q: How do I achieve the translucency porcelain is famous for?
A: Use finest-grade raw materials, maintain thin wall sections (2-4mm), fire to full maturity, and minimize iron contamination throughout the process.
Master the Art of 'How Do You Make Porcelain'
Creating fine porcelain demands patience, precision, and deep understanding of ceramic science. Each stage; from clay preparation through final firing, requires specific knowledge and techniques developed through years of practice.
 A Qing Qianlong 'famille rose' vase. Some the ultimate of all porcelain production
The reward, however, justifies every challenge. When you hold a perfectly fired porcelain piece to the light and see its luminous translucency, you're witnessing the same transformation that captivated Chinese potters over a millennium ago and continues to challenge and inspire ceramicists worldwide.
Remember: porcelain doesn't merely get made, it gets transformed through fire, emerging as something far greater than the sum of its humble mineral origins.

Inherited a china set?... Download my free 7-point checklist to instantly assess its potential value.
You might like these pages too:-
Cold Porcelain DVD - How to Use Sangeeta's Recipes
In this cold porcelain DVD, expert cold porcelain artist, teacher and recipe designer Sangeeta Shah shows you how to use her recipe - 1st Hand
Art Sculpting Ideas For Parents & Kids
Fun art sculpting ideas for parents and kids. Easy clay projects from wall plaques to animals. Free tutorials, beginner-friendly tips. Start creating today!
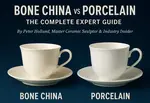
Bone China vs Porcelain: Key Differences, Durability & Value Compared
Discover the main differences between bone china vs porcelain, including durability, appearance, composition, and value. Comparison chart included.
Art Pottery - Revolution Within Revolutions
Art Pottery is the place to sling mud - Bernard Leach turns in his grave
Contemporary Clay Art - Has A New Chic.
Is contemporary clay art pure 'fine art', or is it merely craft? Read this to find out.
Clay Artists - Who Are My Favourites?
Clay Artists have produced some of the most exquisite art known to man. Take a look at my favourite ones.
Coalport Figurines - A Fine History
Coalport Figurines - Craft, Guile and Romance. Shopping galleries and information. Meet the artists.
Master Clay Sculpture Techniques for Factory Production
How professional master clay sculpture techniques translate to factory production - Peter Holland lays it all out simply
Master Clay Sculpting: The Process From Concept to Composition
Master the clay sculpting process from concept to composition. See the structural discipline that creates lasting, high-value collectible art for manufacturers
China Replacement Online - The Secrets of Searching
China replacement tips - How to search online and which sites are the most useful.
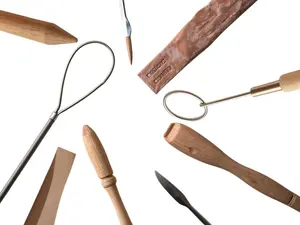
Clay Sculpting Tools Guide: From Essential to Master Tools
Discover the best clay sculpting tools to use, from beginner essentials to master-level model sculpting tools, with pro tips for figurative and ceramic sculpture
Clay and Art Join Forces to Fire-up a New Generation of Fine-Art Potters
Clay and Art combine as the 21stC brings forth a new age of potters. The Turner prize for a wheel-turner? Whatever next? Self-expression fires the kilns

From the Studio
• Peter Holland Posters
• Sculpture Studio