- Home
- Collecting & Sculpting
- Clay For Sculpting Figures
Kinds of Clay For Sculpting Figures & Figurines
This guide about the various kinds of clay for sculpting figures and figurines is written by professional sculptor in all these mediums, Peter Holland
By Peter Holland, Master Sculptor | Updated December 2024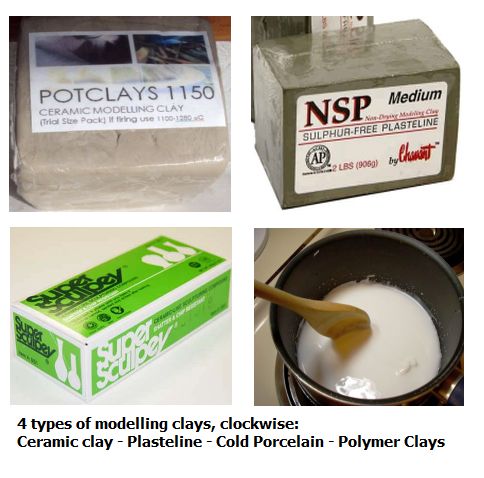
Introduction: Choosing the Right Kinds of Clay For Sculpting Figures & Figurines
If you were wondering what kinds of clay for sculpting figures that are used in professional work, this page serves as a foundational overview of various clay mediums used in sculpture. It is intended to help both new and experienced artists work out which material might best suit their specific project needs, whether for fine art, mold-making, or professional figurine development.
My personal preference is water-based ceramic clay, a choice initially enforced by English bone china manufacturers for professional commissions. While I started with oil-based plasteline and polymer clays, mastering ceramic clay ultimately provided the best professional results.
The kinds of clay for sculpting figures we will be covering are ceramic, plasteline, and polymer clays in depth here. If you are looking for dedicated, in-depth tutorials on each medium, be sure to check out
Andrew Joseph Keith's videos on this subject.
Quick Links: Table of Contents
Jump to a Section:
Quick Comparison: Types of Clay for Sculpting
Not sure which clay is right for your project? This comparison table helps you decide at a glance:
| Clay Type | Best For | Cost | Hardening Method | Durability | Beginner-Friendly? |
|---|---|---|---|---|---|
| Ceramic Clay | Permanent sculptures, figurines, pottery | £ (Low) | Kiln firing (1000°C+) | Excellent | Moderate - requires moisture management |
| Plasteline | Master models, mold-making, film work | ££ (Medium) | Never hardens (reusable) | N/A - remains soft | Yes - very forgiving |
| Polymer Clay | Jewelry, small figures, detailed work | £££ (High) | Home oven (130°C, 30 min) | Moderate | Yes - most accessible |
How to Choose the Best Clay for Sculpting Your Project

Selecting the right modeling clay depends on four key factors. Understanding these will save you time, money, and frustration:
1. Your Skill Level
Complete Beginner: Start with polymer clay (Sculpey or Fimo). It's the most forgiving, requires no special equipment beyond a home oven, and you can experiment without expensive mistakes. Your first few attempts can be baked and kept as learning pieces.
Intermediate Sculptor: Progress to plasteline for larger projects or ceramic clay if you want permanent, display-quality work. Both require more technique but offer professional results.
Professional/Advanced: Ceramic clay for kiln-fired durability and collectible-quality figurines. This is the medium used by bone china manufacturers like Royal Worcester and Coalport. Ceramic clays fall into three categories: earthenware (lowest firing, porous), stoneware (higher firing, can be vitrified), and porcelain (highest firing, translucent). Most figurine sculpting uses stoneware bodies like Potclays 1150.
2. Budget Constraints
Cost varies significantly by clay type:
- Ceramic clay: £8-15 for 10kg (enough for 5-10 small figurines)
- Plasteline: £15-30 per kg (reusable indefinitely, so cost-per-project decreases)
- Polymer clay: £3-5 per 56g block (expensive by weight, but little waste)
Budget tip: Ceramic clay offers the best value for permanent work. Plasteline is cost-effective for practice and master models you'll mold from.
3. Project End-Use
What happens to your sculpture after completion?
- Display piece or gift: Ceramic clay (fired for permanence) or polymer clay (oven-hardened)
- Master model for mold-making: Plasteline (never hardens, allowing perfect mold release)
- Practice or study: Plasteline (reusable) or cheap ceramic clay
- Jewelry or small decorative items: Polymer clay (precise detail, home-oven convenience)

4. Available Equipment
Your workspace determines which clay is practical:
Have a kiln or kiln access? Ceramic clay is your best option for professional-quality, permanent work.
Only a home oven? Polymer clay is ideal. It cures at low temperatures (130°C) in a standard kitchen oven.
No firing equipment at all? Plasteline for master models (which are then cast), or polymer clay with careful oven use.
The bottom line: Most professional sculptors eventually work with all three types for different applications. But if you're starting today, polymer clay offers the lowest barrier to entry, while ceramic clay provides the best long-term value and professional results.
Best Kinds of Clay For Sculpting Figures? - Match With Your Specific Project?
Different projects demand different clay properties. Here's what professional sculptors use for common applications:
Portrait Busts & Figurative Sculpture
Best choice: Ceramic clay (water-based)
Why: Allows finest detail work when at leather-hard stage. Can be fired for museum-quality permanence. Used for all Royal Worcester, Coalport, and Royal Doulton limited edition figurines.
Alternative: Plasteline for study models or master sculptures destined for bronze casting.
Jewelry & Miniature Work
Best choice: Polymer clay (Fimo/Sculpey)
Why: Holds extremely fine detail at small scale. No shrinkage during curing. Can be drilled, sanded, and finished after baking. Available in pre-colored ranges.
Fantasy & Character Sculpture
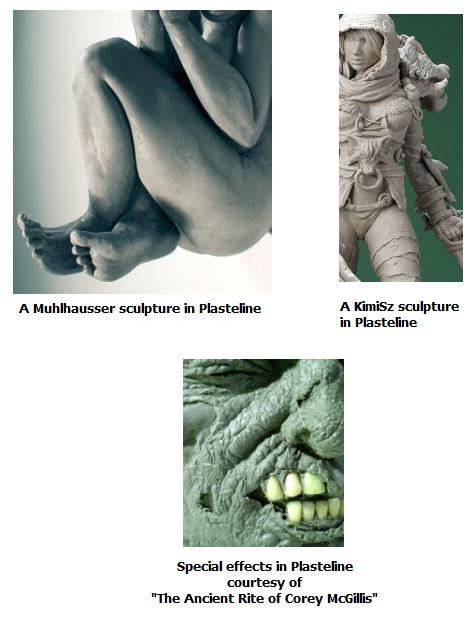
Best choice: Plasteline (oil-based)
Why: Industry standard for film and gaming miniatures. Never dries out during long projects. Can be repeatedly refined without time pressure. Used extensively in special effects studios.
Architectural Models & Relief Sculpture
Best choice: Plasteline or polymer clay
Why: Both allow precise geometric forms. Plasteline is a clay for sculpting figures for large-scale master models. Polymer clay for smaller, finished architectural details that need permanence.
Tabletop Gaming Miniatures
Best choice: Polymer clay or plasteline
Why: Polymer clay for finished, painted miniatures (durable after baking). Plasteline for master sculpts that will be resin-cast in multiples.
Pottery Decoration & Applied Details
Best choice: Ceramic clay (matching your pottery body)
Why: Must fire at same temperature as base pottery. Ceramic sprigging, applied flowers, and decorative elements require compatible clay bodies.
Children's Art Projects
Best choice: Polymer clay
Why: Non-toxic, doesn't dry out mid-project, and parent-supervised oven baking is safe and exciting. Finished pieces are durable enough for play.
Ceramic Clay (Water-Based Medium)


A Note on Other Modeling Materials
For accessibility to the home artist, this guide focuses on the most common clay types. We are intentionally excluding a few specialized areas:
- Hard Wax Sculpting: This niche medium requires complex, heated equipment and is less accessible for the majority of sculptors.
- Air-Drying Clays: Products like Das are generally better suited for school projects and fun crafts than detailed, professional figurine work.
- Plasticine: This patented, brightly coloured product is distinct from professional 'plasteline' and is marketed primarily for children's play.
Storage & Shelf Life of Ceramic Clay
Proper storage: Keep ceramic clay in airtight plastic bags or sealed containers. Double-bag if possible—inner bag for clay, outer bag for extra protection.
Shelf life: Indefinite when properly stored. Clay improves with age as particles become more evenly hydrated. However, once opened and exposed to air, use within 3-6 months for best workability.
Signs clay has gone bad:
- Mold or mildew: Green/black spots indicate bacterial growth. Usually surface only—scrape off and clay underneath is usable.
- Unpleasant smell: Organic materials in clay can decompose. If smell persists after wedging in fresh air, discard.
- Excessively hard or crumbly when wet: Over-aged clay loses plasticity. Can sometimes be reconstituted by adding fresh clay.
Work-in-progress storage: Wrap sculpture tightly in clear plastic bag, ensuring no air gaps. Mist lightly with water before sealing. Check every 2-3 days and re-mist if needed. Properly stored work-in-progress can last weeks.
Cost-per-project: At £8-15 per 10kg, a typical 10-inch figurine uses approximately £2-3 worth of clay, making ceramic clay the most economical choice for permanent work.
(i) Managing Correct Working Consistency
Ceramic clay is highly pliable right out of the bag, which is perfect for rapidly roughing out your basic form to the correct scale. However, it is far too soft for detailing.
A crucial step is pausing to allow the rough shape to harden just enough to hold its own weight. It must remain moist, but reach a consistency where it can only be worked with tools, a state that prevents you from easily squishing it with your hands.
To achieve this, place your work on a damp plaster of Paris bat. The bat manages moisture levels through capillary action and evaporation. When you're not working, cover the piece with a clear plastic bag to keep it in the right state. The bag must be clear to prevent mildew.
Keep your clay at the perfect equilibrium, neither too wet nor too dry, by using a sprayer to lightly mist the surface often, which helps control the evaporation process while you sculpt. In this state, for me, this is the best kind of clay for sculpting figures.
(ii) Preparing and Drying Clay Sculptures for Firing
Pro-Tip for Firing:
- Ensure you sculpt with an even thickness throughout. This may require hollowing out larger areas to prevent warping or cracking.
- Meticulously check that you are not leaving any internal air-pockets between bonded clay pieces.
 If clay is dried too fast, it cracks
The cardinal rule for success is to dry the piece out very slowly, allowing days rather than hours. This gradual process minimizes internal stress and gives you the best chance of preventing cracks before the piece enters the kiln.
Start with the plastic bag mostly covering the sculpture, then open it a bit more each subsequent day. This controlled exposure to air is the best way to prepare the piece for firing.
Professional-Grade Ceramic Clay: Potclays 1150
For professional bone china figurine work, I exclusively use Potclays 1150—an English modeling clay perfected over 250 years in the Staffordshire potteries. This is the secret weapon of top UK ceramic sculptors working for fine china manufacturers. What makes 1150 exceptional is its high ball clay content, giving it superior plasticity that stays workable far longer than standard clays. It's a stoneware body firing from 1100-1280°C, compatible with both earthenware and stoneware glazes. Available from Potclays in 12.5kg bags (they ship worldwide), it's specifically formulated for detailed modeling work where drying time and workability are critical.
Ball clay gives 1150 its superior plasticity—very fine particles that stay workable longer. However, high ball clay content increases shrinkage and cracking risk during drying. Always dry slowly over 5-7 days on a damp plaster bat, gradually exposing to air. Never rush—the better the modeling properties, the trickier the drying process
US Alternatives:
For American sculptors, Amaco No. 20 Moist White Versa Clay offers similar high plasticity ideal for intricate work, though it may dry slightly faster on fine details like fingers. Amaco Buff Firing Clay No. 46 provides good modeling properties at a more economical price point with slightly less plasticity. Both are suitable for figurative sculpture, though I haven't personally tested them against 1150. Test any clay firsthand before committing to professional work, each has unique handling characteristics that affect detail retention and working time.
Plasteline or Plasticine (Oil-Based Modeling Clay)

Plasteline is the popular choice for film studios, special effects departments, and fantasy artists. It is an oil-based clay that, unlike ceramic, never dries out, making it perfect for long-term projects and repeated detailing. Because it remains soft, plasteline cannot be fired. Its sole professional use is as a master model from which production molds are taken.
Before my ceramic clay figurine sculptures for the English potteries, I worked exclusively in plasteline. I brought out several ranges in collaboration with Cumbria factory Heredities and various other firms before switching to ceramic clay (Potclays 1150) in 1997.
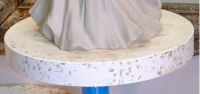
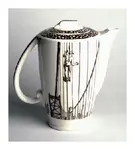
I occasionally use plasteline for pottery figurines when they have features like archways with lots of foliage (see photos below of 'Summer Breeze'.)
 Plasteline comes in hard, medium and soft
Case Study: Summer Breeze
 I constructed this rose arbour with armature and plasteline clay and polymer clay (not ceramic clay)
For this figurine, I was tasked with making a figurine from ceramic water-based modelling clay in the normal way, but make an armature supported rose arbour with a non-drying non water-based clay. The arbour I was to construct was to act as a background for individual roses to be made by the flower artists in the factory.
I was used to working with plasteline for my projects with Heredities of Cumbria and other factories, so I used heated plasteline to get the idea of foliage and branches and a few swirly 'placemaker' roses - to be removed before production - just there to give a visual idea of hand made rose placement. I wanted a softer material to give the idea of intertwined vines, so I used polymer clay for this (the Fimo brand - the light pink clay) and placed on a few more temporary roses with this clay also. The Fimo is intended for oven baking for hardening, but as this project was destined for slip casting for bone china production, this was not done on this occastion.
This is the only project so far in which I have used all three main kinds of clay for sculpting a figure in one project. It was quite a challenge and quite a feat.
Mixing & Combining Different Clay Types

Advanced sculptors sometimes use multiple kinds of clay for sculpting figures in a single project, each chosen for specific properties. Here's when and how to do this successfully:
When to Combine Clay Types
Structural + Detail Work: The most common combination uses one clay for the main structure and another for fine details.
Example: My "Summer Breeze" commission combined three clays:
- Ceramic clay: The figurine body (destined for firing and production)
- Plasteline: The rose arbour structure (complex armature support needed)
- Polymer clay (Fimo): Intertwined vine details (softer, more pliable for delicate curves)
This combination worked because each element had different production requirements. The figure would be slip-cast in bone china, while the arbour became a separate mold component.
Compatible Combinations
✓ Ceramic clay + Plasteline (Temporary assembly)
Use case: Attach plasteline elements to ceramic clay sculpture for compositional testing. The plasteline can be removed before firing without damaging the ceramic work.
Adhesion: None needed, plasteline grips on surface. Not permanent.
✓ Polymer clay + Polymer clay (Different brands/colors)
Use case: Mixing Sculpey with Fimo to achieve custom colors or firmness. Fimo is firmer; Sculpey is softer.
Adhesion: Excellent—both are PVC-based and fuse during baking. Mix thoroughly for even consistency. This type of clay for sculpting figures os great, and oven hardens, but it is essentially a fragile material destined to degrade in time, unlike fired ceramic.
✓ Plasteline + Plasteline (Different hardnesses)
Use case: Blend hard and soft grades to achieve perfect working consistency.
Adhesion: Perfect—same base material. Knead thoroughly until uniform.
Incompatible Combinations (Don't Attempt)
✗ Ceramic clay + Polymer clay (Permanent join)
Why it fails: Polymer cures at 130°C; ceramic fires at 1000°C+. The polymer would burn away completely. Additionally, polymer shrinks differently than ceramic during its curing, causing cracking even if you tried low-temperature experiments.
✗ Ceramic clay + Plasteline (Firing)
Why it fails: Plasteline is oil-based and will melt, smoke, and burn in kiln. Never fire plasteline. It can only be used as temporary support or for master models that are molded, not fired.
✗ Different ceramic clay bodies (Without testing)
Why it fails: Different clays shrink at different rates and mature at different temperatures. Joining earthenware to porcelain, for instance, results in cracking. Only combine ceramic clays formulated for the same firing temperature and shrinkage rate.
Adhesion Techniques for Compatible Combinations
Joining polymer clay pieces before baking:
- Fresh to fresh: Simply press firmly together. They'll fuse during baking.
- Fresh to baked: Roughen the baked surface slightly with sandpaper, press fresh clay firmly onto it, then bake again. Creates strong bond.
- Baked to baked: Use liquid polymer clay (like Sculpey Bake and Bond) as adhesive. Apply thin layer, press pieces together, bake again.
Joining ceramic clay pieces:
- Leather-hard to leather-hard: Score both surfaces with fork or serrated tool, apply slip (watered-down clay), press firmly together. This is the strongest join.
- Soft to leather-hard: Roughen leather-hard surface, apply slip, press soft clay firmly. Blend edges smooth.
Professional Tip: When combining clays in a single commission, plan the production process first. Ask yourself:
- Will all components fire together, or separately?
- Are any elements temporary (like plasteline support structures)?
- Do different elements need different mold-making approaches?
Answering these questions before starting prevents discovering incompatibilities after investing hours of work.
Mixing Clay Within Same Type
Mixing polymer clay colors: Knead different colors together thoroughly. Use this to create custom colors not available commercially. Keep notes on ratios if you need to recreate a color later.
Mixing plasteline hardnesses: Combine hard, medium, and soft grades to achieve ideal working consistency. Start with 2 parts medium, 1 part soft for general-purpose work. Adjust based on personal preference and detail requirements.
Mixing ceramic clay bodies: Avoid unless you have technical knowledge of clay chemistry. Different clay bodies have different shrinkage rates, firing temperatures, and mature properties. Mixing can cause warping, cracking, or firing failures. If you must experiment, test fire small samples first. Personally, being a sculptor, not a technician, I steer away from these types of areas and stick simply to clay for sculpting figures.
The Multiple-Clay Workflow
When working with multiple clays in one project:
- Plan the production sequence: Which elements are permanent? Which are temporary? What order do they get created?
- Work with most permanent material first: Usually ceramic clay for the main structure.
- Add temporary or supportive materials: Plasteline for testing pose adjustments, polymer clay for delicate details.
- Photograph extensively: Document each stage. Complex multi-material projects need visual reference for production planning.
- Separate before final processing: Remove incompatible materials before firing or molding.
Softening the Medium: Plasteline is typically much less pliable than ceramic clay right out of the package. It must be softened before use, usually by leveraging your own body heat, or by briefly warming it in a pan or microwave.
Although plasteline is typically more expensive by weight than ceramic clay (but less than oven hardening polymer clay), its versatility is valuable. It is sold in various harnesses (hard, medium, soft) which can be mixed to achieve the perfect consistency for high-precision, fine-detail work. The kinds of clay for sculpting figures you prefer is up to you. Ceramic clay is cheaper, great to work with and the end result can be fired in a kiln. A kind of all in one kind of clay for sculpting figures.
Storage & Shelf Life of Plasteline
Proper storage: Wrap in cling film or store in sealed plastic containers. Unlike ceramic clay, plasteline doesn't require moisture—you're protecting it from dust and dirt contamination.
Shelf life: Decades when properly stored. I have plasteline from the 1980s that's still perfectly usable. Quality plasteline is a long-term investment.
Signs plasteline has degraded:
- Oil separation: Shiny surface film means plasticizers have separated. Usually fixable by kneading—the warmth reincorporates oils.
- Grainy or crumbly texture: Extreme age or temperature cycling. Knead thoroughly; add tiny amounts of mineral oil if severely dried out.
- Won't soften despite heating: Very rare, but indicates chemical breakdown. Time to replace.
Work-in-progress storage: Simply cover with cloth to prevent dust. No special care needed—plasteline won't dry out. Large studios leave works-in-progress uncovered for months.
Cost-per-project: Initial cost is higher (£15-30 per kg), but plasteline is endlessly reusable. A one-time £50 investment in 2-3kg provides years of material for master model work, making it extremely cost-effective long-term.
Polymer Clay (Oven-Bake Mediums)

Commercial polymer clays like Fimo and Sculpey are synthetic, PVC-based compounds that harden at low temperatures in a standard domestic oven. For many, this convenience is a major draw, as it eliminates the need for expensive kiln firing.

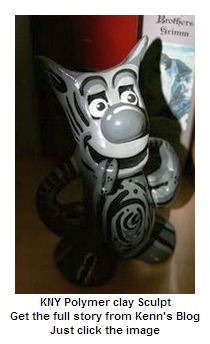
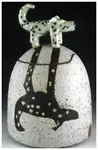
Many renowned artists, such as Katherine Dewey (known for her fantastic figurative work, like the Dragonfly sculpt pictured) and 'KNY' (who enjoys 'free-style' polymer sculpture, shown below), utilize this medium to great effect.
- Layering: Artists can apply a thin skin over an armature, bake it for stability, and then continue adding soft clay for further refinement.
- Blending & Smoothing: Solvents specifically designed for polymer clay, or simple lighter fluid, can be used to seamlessly blend and smooth surfaces, as seen in the finished piece by Nadia Evans (below).
- Color Customization: Fimo is excellent for intricate, small work. Mixing small amounts with Sculpey allows for customized color palettes.

Polymer Clay Trade-Offs:
Despite the convenience of oven-hardening, there are a few drawbacks to consider:
- It is relatively expensive by weight compared to water-based ceramic clay.
- The finished, baked product is considerably less structurally strong and durable than a piece of high-fired ceramic.
Storage & Shelf Life of Polymer Clay
Proper storage: Keep in original packaging or sealed plastic bags/containers. Store in cool, dark place—heat and light begin the curing process prematurely.
Critical storage rule: Never store polymer clay touching cardboard, paper, or wood. These materials leach plasticizers, leaving clay crumbly and unusable. Use plastic or glass only.
Shelf life: 2-5 years unopened when stored properly. Opened blocks: 1-2 years. Check manufacturer dates—Sculpey and Fimo stamp production dates on packaging.
Signs polymer clay has gone bad:
- Crumbly, won't hold together: Plasticizers have leached or evaporated. Add polymer clay softener (or 2-3 drops mineral oil per 56g block) and knead for 5 minutes.
- Chalky or excessively stiff: Partial curing from heat exposure. If kneading doesn't restore pliability, clay is unusable.
- Discolored or sticky surface: Chemical breakdown. If discoloration is just surface, scrape off. If throughout, discard.
Work-in-progress storage: Wrap in cling film or seal in plastic container. Polymer clay won't dry out, but you're preventing dust and accidental partial curing. Can be stored for months between work sessions.
Cost-per-project: Most expensive by weight (£3-5 per 56g), but minimal waste. A small jewelry piece might use £1-2 of clay. A 6-inch figurine requires £8-12 worth. Budget accordingly for larger projects.
Safety & Workspace Requirements for Clay Sculpting
Talking about clay for sculpting figures is very fun, but let's get our health and safety hats on for a moment. Working safely with modeling clay is straightforward, but each clay type has specific considerations. Here's what you need to know:
Ceramic Clay Safety
Primary concern: Silica dust
Dry ceramic clay produces fine silica dust which, when inhaled repeatedly over years, can cause silicosis (lung scarring). Professional sculptors take this seriously.
Safe practices:
- Never sand or scrape dry clay: Always work with damp clay. If you must sand fired pieces, wear a proper dust mask (N95 minimum, P100 better) and work outdoors or with ventilation.
- Wet-clean your workspace: Use damp sponge rather than sweeping or dry-wiping. This prevents dust becoming airborne.
- Wash hands thoroughly: Before eating or touching face. Clay particles transfer easily.
- Separate food and clay areas: Never use kitchen tools for clay work. Even trace amounts of clay are unpleasant if ingested.
Workspace needs: Washable surface (plastic table cover works well), access to water for cleaning, adequate lighting. Plaster bat for moisture control. Temperature 18-22°C ideal—too cold and clay stiffens, too hot and it dries too quickly.
Plasteline Safety
Primary concern: Generally very safe clay for sculpting figures and other projects.
Plasteline (professional oil-based clay) is non-toxic and produces no dust or fumes. This is why it's industry standard for film and special effects work.
Safe practices:
- Hand washing: Oil-based clay can be stubborn to remove. Use hand cleaner designed for oil/grease (like Swarfega) before soap and water.
- Heating safely: When softening plasteline, never overheat. Use low microwave power or warm (not hot) water. Overheated plasteline can cause minor burns.
- Avoid ingestion: While non-toxic, plasteline contains oils and fillers not meant for consumption. Keep away from young children who might mouth objects.
Workspace needs: Any stable work surface. Room temperature 18-24°C—plasteline is easier to work in warmer environments. Good lighting essential for detail work. No special ventilation required.
Polymer Clay Safety (CRITICAL INFORMATION)
Primary concerns: Oven fumes and food safety
IMPORTANT: Polymer clay is safe when used correctly, but produces potentially harmful fumes if overheated. Follow these rules without exception:
Safe baking practices:
- Never exceed recommended temperature: Most polymer clays cure at 130°C (265°F). Even 20°C over this produces toxic fumes. Use an oven thermometer—many home ovens run 10-30°C off their display.
- Ventilate during and after baking: Open windows, run exhaust fan. Polymer clay produces mild fumes even at correct temperature. If you smell strong chemical odor, temperature is too high—open windows immediately and check oven temperature.
- Don't bake polymer clay in toaster ovens: These have extreme temperature fluctuations and "hot spots" that can scorch clay, producing toxic fumes.
- If clay scorches (turns black/brown): Turn off oven immediately, ventilate house thoroughly, leave premises for 30 minutes. Discard scorched clay. Clean oven before using for food.
Food safety rules:
- Dedicated baking surface: Use ceramic tile or metal baking sheet covered with parchment paper. Don't reuse baking sheets for food after polymer clay use.
- Don't use polymer clay on food-contact items: Cured polymer clay is not food-safe. Don't make plates, cups, utensils, or anything that touches food or mouth.
- Don't condition polymer clay near food: Uncured clay can transfer to surfaces. Work on dedicated craft table, not kitchen counter.
- Wash hands thoroughly: Before touching food or face. Polymer clay contains plasticizers that you don't want to ingest.
Workspace needs: Well-ventilated area (window that opens). Dedicated work surface with washable cover. Oven with accurate temperature control. Optional: small convection oven dedicated to polymer clay (better temperature control than home oven). Storage away from heat sources.
Child Safety Considerations
Safest option for children: Polymer clay under adult supervision. Non-toxic, no sharp tools required for basic work, and controlled baking process.
Avoid for young children:
- Ceramic clay: Dust concerns, requires kiln access (extreme heat danger), heavy equipment.
- Plasteline: Generally safe but can be frustrating for small hands (too hard to manipulate). Professional grades are not marketed for children.
Note on "Plasticine": The brightly colored children's product is distinct from professional plasteline. It's safe for young children but unsuitable for serious sculpting.
General Workspace Safety
Regardless of clay type:
- Good lighting prevents eye strain: Natural light is ideal; supplement with daylight-spectrum LED bulbs.
- Ergonomic setup prevents injury: Adjustable-height turntable, proper chair support, work surface at comfortable height.
- Regular breaks prevent repetitive strain: Every 45-60 minutes, stand, stretch, rest eyes.
- First aid basics: Keep plasters/bandages handy. Clay tools can cause minor cuts. Wash any cuts immediately and thoroughly.
Troubleshooting: Solving Common Clay Sculpting Problems
Every sculptor encounters these challenges. Here are proven solutions from decades of professional experience:
Ceramic Clay Issues
Problem: My sculpture cracked during drying
Causes & Solutions:
- Dried too quickly: Slow drying is critical. Cover with plastic bag, opening gradually over 5-7 days rather than 1-2 days.
- Uneven thickness: Thick and thin sections dry at different rates, creating stress cracks. Hollow out thick areas to maintain even 1-2cm walls throughout.
- Air pockets trapped: Score and slip all joins thoroughly. Trapped air expands as clay dries, causing cracks or explosions in the kiln.
Problem: Clay is too soft and won't hold detail
Solution: Let it firm up on a plaster bat for 30-60 minutes. You want leather-hard consistency—moist but firm enough that finger pressure barely dents it. This is the ideal state for fine detail work.
Problem: Clay dried out before I finished
Prevention: Always keep work covered with a clear plastic bag when not actively sculpting. Mist with water spray bottle every 15-20 minutes during work sessions.
Recovery: If bone-dry, you can sometimes reconstitute by wrapping in damp towels for 24-48 hours, sealed in plastic. Success depends on how long it was dry.
Plasteline Issues
Problem: Plasteline is too hard to work
Solutions:
- Body heat method: Knead small amounts in your hands for 5-10 minutes until pliable.
- Microwave method: 10-second bursts on low power, kneading between. Be careful—overheating creates unusable, oily clay.
- Warm water bath: Seal clay in ziplock bag, submerge in warm (not hot) water for 15-30 minutes.
- Buy softer grade: If consistently struggling, switch from hard to medium plasteline.
Problem: Plasteline is too soft and detail smears
Solution: Mix in harder grade plasteline (1 part hard to 2 parts soft works well). Alternatively, briefly chill in refrigerator for 30 minutes to firm up before fine detail work.
Problem: Old plasteline has separated or become grainy
Solution: This happens with age and temperature cycling. Knead thoroughly—it's tedious but usually recovers. For severely degraded clay, warm and knead in small amounts of mineral oil.
Polymer Clay Issues
Problem: Sculpture broke after baking
Causes & Solutions:
- Under-baked: Most polymer clay needs 30 minutes at 130°C per 6mm thickness. Thick pieces need longer. Use oven thermometer—many ovens run 10-20°C off.
- Too thin or unsupported: Thin extensions (arms, legs) need internal wire armature for strength. Add aluminum wire or floral wire before sculpting.
- Sudden temperature change: Let cool completely in oven before removing. Thermal shock causes cracks.
Problem: Surface is shiny/scorched or has brown spots
Solution: Temperature too high. Verify oven temperature with thermometer. Many run hot. Cover sculpture with aluminum foil tent to prevent scorching while still allowing proper curing.
Problem: Colors look different after baking
Solution: This is normal—polymer clay darkens slightly during curing. Test-bake color samples before committing to large projects. Translucent clays yellow with overbaking.
Problem: Clay is crumbly and won't blend smoothly
Causes & Solutions:
- Old or improperly stored: Polymer clay has 2-5 year shelf life. Add a few drops of polymer clay softener (or mineral oil as emergency measure) and knead thoroughly.
- Leached plasticizer: If stored on paper/cardboard, plasticizers can leach out. Always store in plastic containers or bags.
Pro-Tip: Keep a troubleshooting journal. Note your workspace temperature, humidity, and any problems encountered. Patterns emerge quickly—ceramic clay behaves differently in summer vs. winter, and your solutions become faster each time.
Summary and Final Thoughts
We've explored how to sculpt and manage the three key modeling mediums:
- Ceramic Clay: Best for strong, finished, fired pieces; requires high maintenance of moisture content.
- Plasteline: Ideal for highly detailed master models and long-duration sculpting; requires mold-making as it never hardens.
- Polymer Clay: Conveniently hardened in a home oven; suitable for small work, but lacks the strength of fired ceramics.
Ultimately, your success in knowing the right kinds of clay for sculpting figures, figurines and other projects, comes down to intimate knowledge of your raw materials. Don't hesitate to experiment and try them all out! Happy modeling!
Beginner's First Purchase Guide: What to Buy Today
Ready to start sculpting? Here's exactly what to buy based on your situation:
Option 1: Complete Beginner—Polymer Clay Starter (£25-35 Total)
Best for: Testing whether you enjoy sculpting before major investment. Immediate results with home oven.
Shopping list:
- Polymer clay: 3-4 blocks Sculpey III or Fimo Soft in flesh tone/white (£12-16)
Where to buy: Hobbycraft, Amazon, local craft stores - Basic tool set: 5-piece wooden modeling tools (£8-12)
Where to buy: Amazon, eBay, craft stores—search "clay sculpting tools beginner" - Baking surface: Ceramic tile or metal baking sheet + parchment paper (£3-5)
Where to buy: Hardware store (tile), supermarket (baking sheet) - Oven thermometer: Essential for safe temperature control (£5-8)
Where to buy: Kitchen supply stores, Amazon
First project: Simple animal or figure 3-4 inches tall. Follow basic YouTube tutorial. Total time: 2-3 hours from start to finished, baked piece.
Option 2: Serious Beginner—Ceramic Clay Setup (£45-70 Total)
Best for: Committed to learning properly. Willing to seek kiln access for firing. Best value long-term.
Shopping list:
- Ceramic clay: 5-10kg Potclays 1150 or similar smooth stoneware (£10-18)
Where to buy: Pottery supply stores, online ceramics retailers like Clay Supplies (UK), Scarva Pottery Supplies - Tool set: 8-10 piece wooden/wire tool set including ribbon tools (£15-25)
Where to buy: Pottery supply stores, Amazon, Tiranti (specialist sculpture supplies) - Plaster bat: 30cm diameter for moisture control (£12-15) OR make your own with Plaster of Paris (£5-8)
Where to buy: Pottery supply stores, or DIY stores for plaster - Spray bottle: For keeping clay moist (£2-3)
Where to buy: Pound shops, garden centers, supermarkets - Plastic sheeting: Clear plastic bags or sheet for covering work (£3-5)
Where to buy: Hardware stores, packaging suppliers - Wire clay cutter: For cutting blocks and hollowing (£5-8)
Where to buy: Pottery supply stores
Kiln access: Search "pottery studio near me" or "ceramic firing services." Expect £5-15 per piece for firing. Many studios offer beginner courses that include kiln access.
First project: Simple bowl or standing figure 6-8 inches tall. Allow 1 week for slow drying, then take to firing service.
Option 3: Practice Focus—Plasteline Setup (£40-60 Total)
Best for: Learning anatomy, gesture, and form without time pressure. Creating master models for mold-making.
Shopping list:
- Plasteline: 1kg medium grade (£18-25) OR 500g medium + 500g soft for mixing (£20-30)
Where to buy: Sculpture supply stores like Tiranti, Cornelissen, online sculpture retailers - Tool set: 8-piece wooden tools (£12-18)
Where to buy: Same as above - Turntable: Basic rotating platform or lazy susan (£8-15)
Where to buy: Kitchen stores, pottery suppliers, Amazon - Armature wire: Aluminum wire 2-3mm diameter for internal support (£5-8)
Where to buy: Sculpture supply stores, craft stores, hardware stores
First project: Portrait or figure study 8-10 inches tall. Can work on it for weeks or months, refining continuously. Never hardens, so endlessly adjustable.
Where to Buy Clay for Sculpting (UK Recommendations)
Specialist sculpture suppliers (best quality, expert advice):
- Tiranti (London + online): tiranti.co.uk – Premium tools and materials
- Scarva Pottery Supplies (Northern Ireland + online): scarva.com – Excellent ceramic clay range
- Cornelissen (London + online): cornelissen.com – Fine art and sculpture materials
- Clay Supplies (online): claysupplies.co.uk – Good value ceramic clays
Craft stores (convenient, slightly higher prices):
- Hobbycraft: 60+ UK stores – Good polymer clay selection
- The Works: Budget craft supplies, limited but cheap polymer clay
Online marketplaces (price comparison):
- Amazon UK: Wide selection, read reviews carefully for quality
- eBay UK: Bulk clay deals, vintage tools, bargains on larger quantities
How Much Clay Do You Actually Need?
Polymer clay: One 56g block makes a figure 3-4 inches tall OR 2-3 small jewelry pieces. Start with 3-4 blocks (200-250g total) for your first project.
Ceramic clay: A 10-inch figurine uses approximately 1-1.5kg of clay. Buy 5-10kg to allow for practice, mistakes, and multiple projects. Clay keeps indefinitely when properly stored.
Plasteline: 1kg is sufficient for a 8-10 inch figure with armature support. Because it's reusable, buying 1-2kg provides years of material.
Money-Saving Tip: Join a local pottery or sculpture group. Members often share bulk purchases of clay (reducing per-kilo cost significantly), provide kiln access, and offer advice that prevents expensive beginner mistakes. Search Facebook for "pottery group [your town]" or check community centers for sculpture classes.
The Complete Beginner Toolkit (Ultimate Setup: £150-200)
If budget allows and you're fully committed, invest in a professional foundation setup that will serve you for years:
- 5kg ceramic clay + 500g polymer clay + 1kg plasteline (£40-55)
- Professional 12-piece tool set including ribbons, wire tools, detail tools (£30-45)
- Rotating sculpture turntable, height-adjustable (£35-60)
- Plaster bat + spray bottle + plastic sheeting (£15-20)
- Proportional dividers for accurate scaling (£12-18)
- Reference books on anatomy and proportion (£20-30)
This investment eliminates false starts and provides everything needed to develop genuine skill over the next 1-2 years.
This detailed guide was created and authored by Peter Holland, an Expert Figurative Sculptor with professional experience in figurine and bone china development and many ears experience in using various clay for sculpting figures, figurines and other projects.
Frequently Asked Questions About Clay for Sculpting Figures
What is the best clay for sculpting beginners?
Polymer clay (Sculpey or Fimo) is the best choice of clay for sculpting figures for complete beginners. It requires no special equipment beyond a home oven, doesn't dry out while you work, holds fine detail well, and is forgiving of mistakes. You can complete your first project in a single afternoon—sculpt, bake, and have a permanent finished piece. Once comfortable with basic techniques, progress to ceramic clay for professional-quality work or plasteline for larger practice projects.
Can you fire polymer clay in a kiln?
No, never fire polymer clay in a kiln. Polymer clay cures at low temperatures (130°C/265°F) in a standard home oven for 30 minutes. Kiln temperatures (1000°C+) would completely incinerate polymer clay, producing toxic fumes and ruining your kiln. Polymer clay is PVC-based plastic, not ceramic material. Only ceramic (water-based) clay can be kiln-fired.
What's the difference between plasticine and plasteline?
Plasticine is a brand-name children's modeling compound—brightly colored, soft, and marketed for play. It's an unsuitable clay for sculpting figures for serious sculpting.
Plasteline (also called plastalina or oil-based clay) is professional modeling material used in film studios, special effects, and fine art. It comes in hard, medium, and soft grades, never dries out, and can be refined to extremely fine detail. Professional plasteline costs significantly more but offers precision and re-usability that children's plasticine as a clay for sculpting figures cannot match.
Is air dry clay good for sculpting?
Air dry clay works for craft projects and children's activities, but has serious limitations for quality sculpting:
- Weak structure: Air-dried pieces are fragile and cannot achieve the strength of fired ceramic or properly cured polymer clay.
- Prone to cracking: Dries unevenly, causing frequent cracks and warping.
- Poor detail retention: Shrinks unpredictably during drying, distorting fine details.
- Not waterproof: Redissolves if exposed to moisture unless sealed extensively.
For permanent, display-quality sculpture, use ceramic clay (kiln-fired) or polymer clay (oven-cured) instead. Both offer far superior strength, detail, and longevity.
Can I use ceramic clay without a kiln?
Yes, but with limitations. You can create beautiful, detailed sculptures with ceramic clay and leave them unfired (called "greenware"). However, unfired ceramic clay remains fragile, dissolves in water, and cannot be handled roughly. It's suitable for temporary master models for mold-making, or delicate display pieces kept behind glass. For permanent, durable work, kiln access is essential. Many communities offer kiln rental or firing services—search for local pottery studios, community colleges, or ceramic supply shops that provide firing services for £5-15 per piece.
How much does modeling clay cost?
Prices vary significantly by type of clay for sculpting figures:
- Ceramic clay: £8-15 for 10kg (excellent value, lowest cost per project)
- Plasteline: £15-30 per kg (higher initial cost, but reusable indefinitely)
- Polymer clay: £3-5 per 56g block (most expensive by weight, but minimal waste for small projects)
For beginners, start with 2-3 blocks of polymer clay (£10-15 total) to test if you enjoy sculpting. If you commit to the craft, invest in 5-10kg of ceramic clay (£10-20) which provides material for months of practice.
What tools do I need for clay sculpting?
Absolute basics for starting (under £20):
- Simple wooden modeling tools (5-piece set: £8-12)
- Craft knife or blade (for cutting/trimming: £3-5)
- Spray bottle for water (ceramic clay only: £2-3)
- Smooth work surface or turntable (lazy susan works: £5-10)
Intermediate additions (£30-50 more):
- Wire-end tools for detail work
- Proportional dividers for measuring
- Ribbon tools for hollowing
- Proper rotating sculpture turntable
See our comprehensive Tools for Clay Sculpting - Basic to Advanced for detailed recommendations at every skill level of how to work clay for sculpting figures.
How long does it take to learn clay sculpting?
Basic competence: 3-6 months of regular practice (2-3 sessions per week) to create recognizable, satisfying simple figures.
Intermediate skill: 1-3 years to develop personal style, understand proportions intuitively, and produce work you're proud to display or gift.
Professional mastery: 5-10+ years (the classic "10,000 hours") to achieve factory-commission quality, consistent precision, and collector-grade refinement.
However, progress varies enormously by individual talent, practice frequency, and quality of instruction. Some natural sculptors create impressive work within months; others take years to develop confidence. The key is consistent practice—even 30 minutes daily produces faster progress than occasional marathon sessions.
Can you sculpt with regular pottery clay?
Yes, absolutely, but you will not get the precise bone china factory grade finishing with a non specific modeling clay. "Pottery clay" and "ceramic clay" are the same thing—water-based earthenware or stoneware clay. The clay used for throwing pots on a wheel works perfectly for hand-sculpted figurines. In fact, most professional bone china figurines for Royal Worcester, Coalport, and Royal Doulton start as sculptures made from standard pottery clay (often Potclays 1150 or similar). The key is choosing clay with fine particle size that can hold detail—avoid heavily-grogged clays meant for architectural work, which are too coarse for detailed sculpting.
What kind of clay for sculpting figures is better for miniatures: polymer or ceramic clay?
Polymer clay is superior for miniature work (anything under 4 inches/10cm tall) for several reasons:
- No shrinkage: Polymer clay maintains exact dimensions after curing. Ceramic clay shrinks 10-15% during drying and firing, making precise miniature work extremely difficult.
- Structural stability at small scale: Tiny polymer clay elements (thin arms, delicate fingers) remain strong after baking. Ceramic clay at miniature scale is extremely fragile unless fired to high temperatures.
- No cracking: Small ceramic pieces crack easily during drying if thickness varies even slightly. Polymer avoids this entirely.
Ceramic clay works better for larger figurines (8 ish inches or more) where its strength after firing, lower cost, and professional finishing options outweigh the shrinkage challenge. It also can be prepared for slip casting easily.
Do I need an armature for clay sculpture?
It depends on your clay type and sculpture design:
Ceramic clay: Generally NO armature for bone china figurine work. Internal wire would interfere with slip-casting production. Instead, sculptors carefully balance forms and use strategic thickness to support weight.
Polymer clay: YES for any extended elements (arms, legs, necks) or sculpture over 6 inches tall. Use aluminum wire or wire mesh as internal support. The armature remains in place permanently after baking and prevents breakage.
Plasteline: YES for large sculptures or anything that will stand unsupported. Use aluminum wire armature or wooden support structures. Since plasteline never hardens, internal support is essential for poses that would otherwise collapse under their own weight.
Still have questions? The clay sculpting community is welcoming and helpful. I have helped several people fo from amateur to pro - contact me.
Discover the Value of Your Fine China
The sculpting and molding principles discussed on this page are the very foundations of the high-quality figurines and tableware created by historic bone china manufacturers.
If you own vintage pieces or inherited sets, leverage our expert resources to identify patterns, understand their provenance, and accurately value your china collection.

Inherited a china set?... Download my free 7-point checklist to instantly assess its potential value.
You might like these pages too:-
Clay Artists - Who Are My Favourites?
Clay Artists have produced some of the most exquisite art known to man. Take a look at my favourite ones.
Clay and Art Join Forces to Fire-up a New Generation of Fine-Art Potters
Clay and Art combine as the 21stC brings forth a new age of potters. The Turner prize for a wheel-turner? Whatever next? Self-expression fires the kilns
The Collectible Figurine - Why We Collect
The Collectible Figurine - WHY ARE WE FIGURINE COLLECTORS?
Caring For Figurines
Caring For Figurines - There is a skill to it. Learn how to properly care for your prized collection
The English Bone China Tradition - An Insider's View
Connoisseurs of English bone china will enjoy some unique insights to this long tradition
Coalport Figurines - A Fine History
Coalport Figurines - Craft, Guile and Romance. Shopping galleries and information. Meet the artists.
Contemporary Clay Art - Has A New Chic.
Is contemporary clay art pure 'fine art', or is it merely craft? Read this to find out.
Art Pottery - Revolution Within Revolutions
Art Pottery is the place to sling mud - Bernard Leach turns in his grave
Collectible Figurines - The 'Collecting Buzz'
Collectible figurines interactive page - tell your story, meet the artists, ask a question, share your buzz online!
Cold Porcelain Fria Recipe Secret
Cold Porcelain Recipe Secret - Find out Nicole's 'Microwave Method'
cp-recipe
cp-recipe
How To Sculpt Faces in Clay
How to sculpt faces in clay is one of the most frequently asked questions. This article attempt to de-mystify.
Cold Porcelain DVD - How to Use Sangeeta's Recipes
In this cold porcelain DVD, expert cold porcelain artist, teacher and recipe designer Sangeeta Shah shows you how to use her recipe - 1st Hand
China replacements - Website Review
China replacements - This a review of the best of the web for chasing your china items
Master Clay Sculpting: The Process From Concept to Composition
Master the clay sculpting process from concept to composition. See the structural discipline that creates lasting, high-value collectible art for manufacturers
Collectible Figurines
A Selection of Collectible figurines sculpted by Peter Holland
Clay Sculpture Detailing Techniques By Master Ceramic Sculptor
Clay sculpture detailing & finishing techniques; how we make clay figures so neat and perfect. Part 3 of the 'sculpt from clay' for bone china production series
China Replacement Online - The Secrets of Searching
China replacement tips - How to search online and which sites are the most useful.
Clay Art Goes Back to Pre-historic Times
How old is clay art? Stone Age man developed the technology to make ceramic art - and we have been obsessed ever since.
Porcelain China - The Complete Online Guide
A unique online guide to porcelain china with brief talking points for quick connoisseurs
Cold Porcelain Recipe
Cold porcelain is an air drying clay made from a recipe of corn starch (flour) and glue. Difficult to get mix, we look at how to make it just right
Where to Buy Clay Sculpting Supplies - Trusted Suppliers Guide
Find quality clay sculpting supplies from expert-vetted UK and US suppliers. Tools, ceramic clay, kilns, and in-person advice for beginners to professionals.
English China - A Brief Bone China History
A quick reference guide to the bone china history of English China.
Art Sculpting Ideas For Parents & Kids
Fun art sculpting ideas for parents and kids. Easy clay projects from wall plaques to animals. Free tutorials, beginner-friendly tips. Start creating today!
How is Bone China Made? A Master Sculptor’s Guide
How is bone china made? Curious about the craftsmanship? Here's a master sculptor's guide to both collecting & sculpting and what makes each piece so special.


From the Studio
• Peter Holland Posters
• Sculpture Studio